Day Two Automation Self Service Framework – Part 3
Today we will be reviewing the workflow package used to handle all of the aspects of this automated process. We will be leveraging several built workflows and actions, a set of community sourced workflows, and a simple workflow that stitches them together.
The other posts in this series can be found below:
- Day Two Automation Self Service Framework – Part 1
- Day Two Automation Self Service Framework – Part 2
- Day Two Automation Self Service Framework – Part 3 (this post)
Overview
This post will cover importing our vRO code, a brief breakdown of the code and performing a test run of the code.
Import vRO Package
I have created a vRO package that contains all the needed code. It was authored with vRO 8.2, however the code does not leverage anything specific to vRO 8.2, meaning it should work in earlier releases, however I have not tested importing the package.
Begin by downloading the vRO package. The download linked here, was the latest version of the code at the time of publishing. If you want to verify that you are using the current version - you can check my vRO Repo on GitHub.
To import the package log into your vRO instance and navigate to the packages section: Assets->Packages, and select Import.

Walk through the wizard to import the package. The package will add the following items to your vRO inventory or in the case of ones that are built-in ensure they are there.
   - Workflows
      - Remove All Snapshots
      - Create snapshot (Exception Framework)
      - Create a snapshot
      - Add tag to VC vm
      - Create vSphere VM Tag
      - Create vSphere Tag Category
      - Associate vSphere Tag to VM
    - Actions
      - removeAllSnapshots
      - vim3WaitTaskEnd
      - createSnapshot
After importing the package, you will want to execute the Import VAPI metamodel workflow, and then the Add VAPI endpoint workflow. These workflows enable the VAPI plugin, which allows vRO to interact with the vCenter API endpoint, as opposed to the SDK endpoint we configured previously using the VC Plug-in

Code Review
We will be primarily looking at the workflow the orchestrates the process: Create snapshot (Exception Framework) as the others are either built in, or covered in a seperate post. Assuming the workflow package imported successfully, this workflow can be found in the following location in the folder tree view of vRO: Workflows->sentania.net->Snapshot.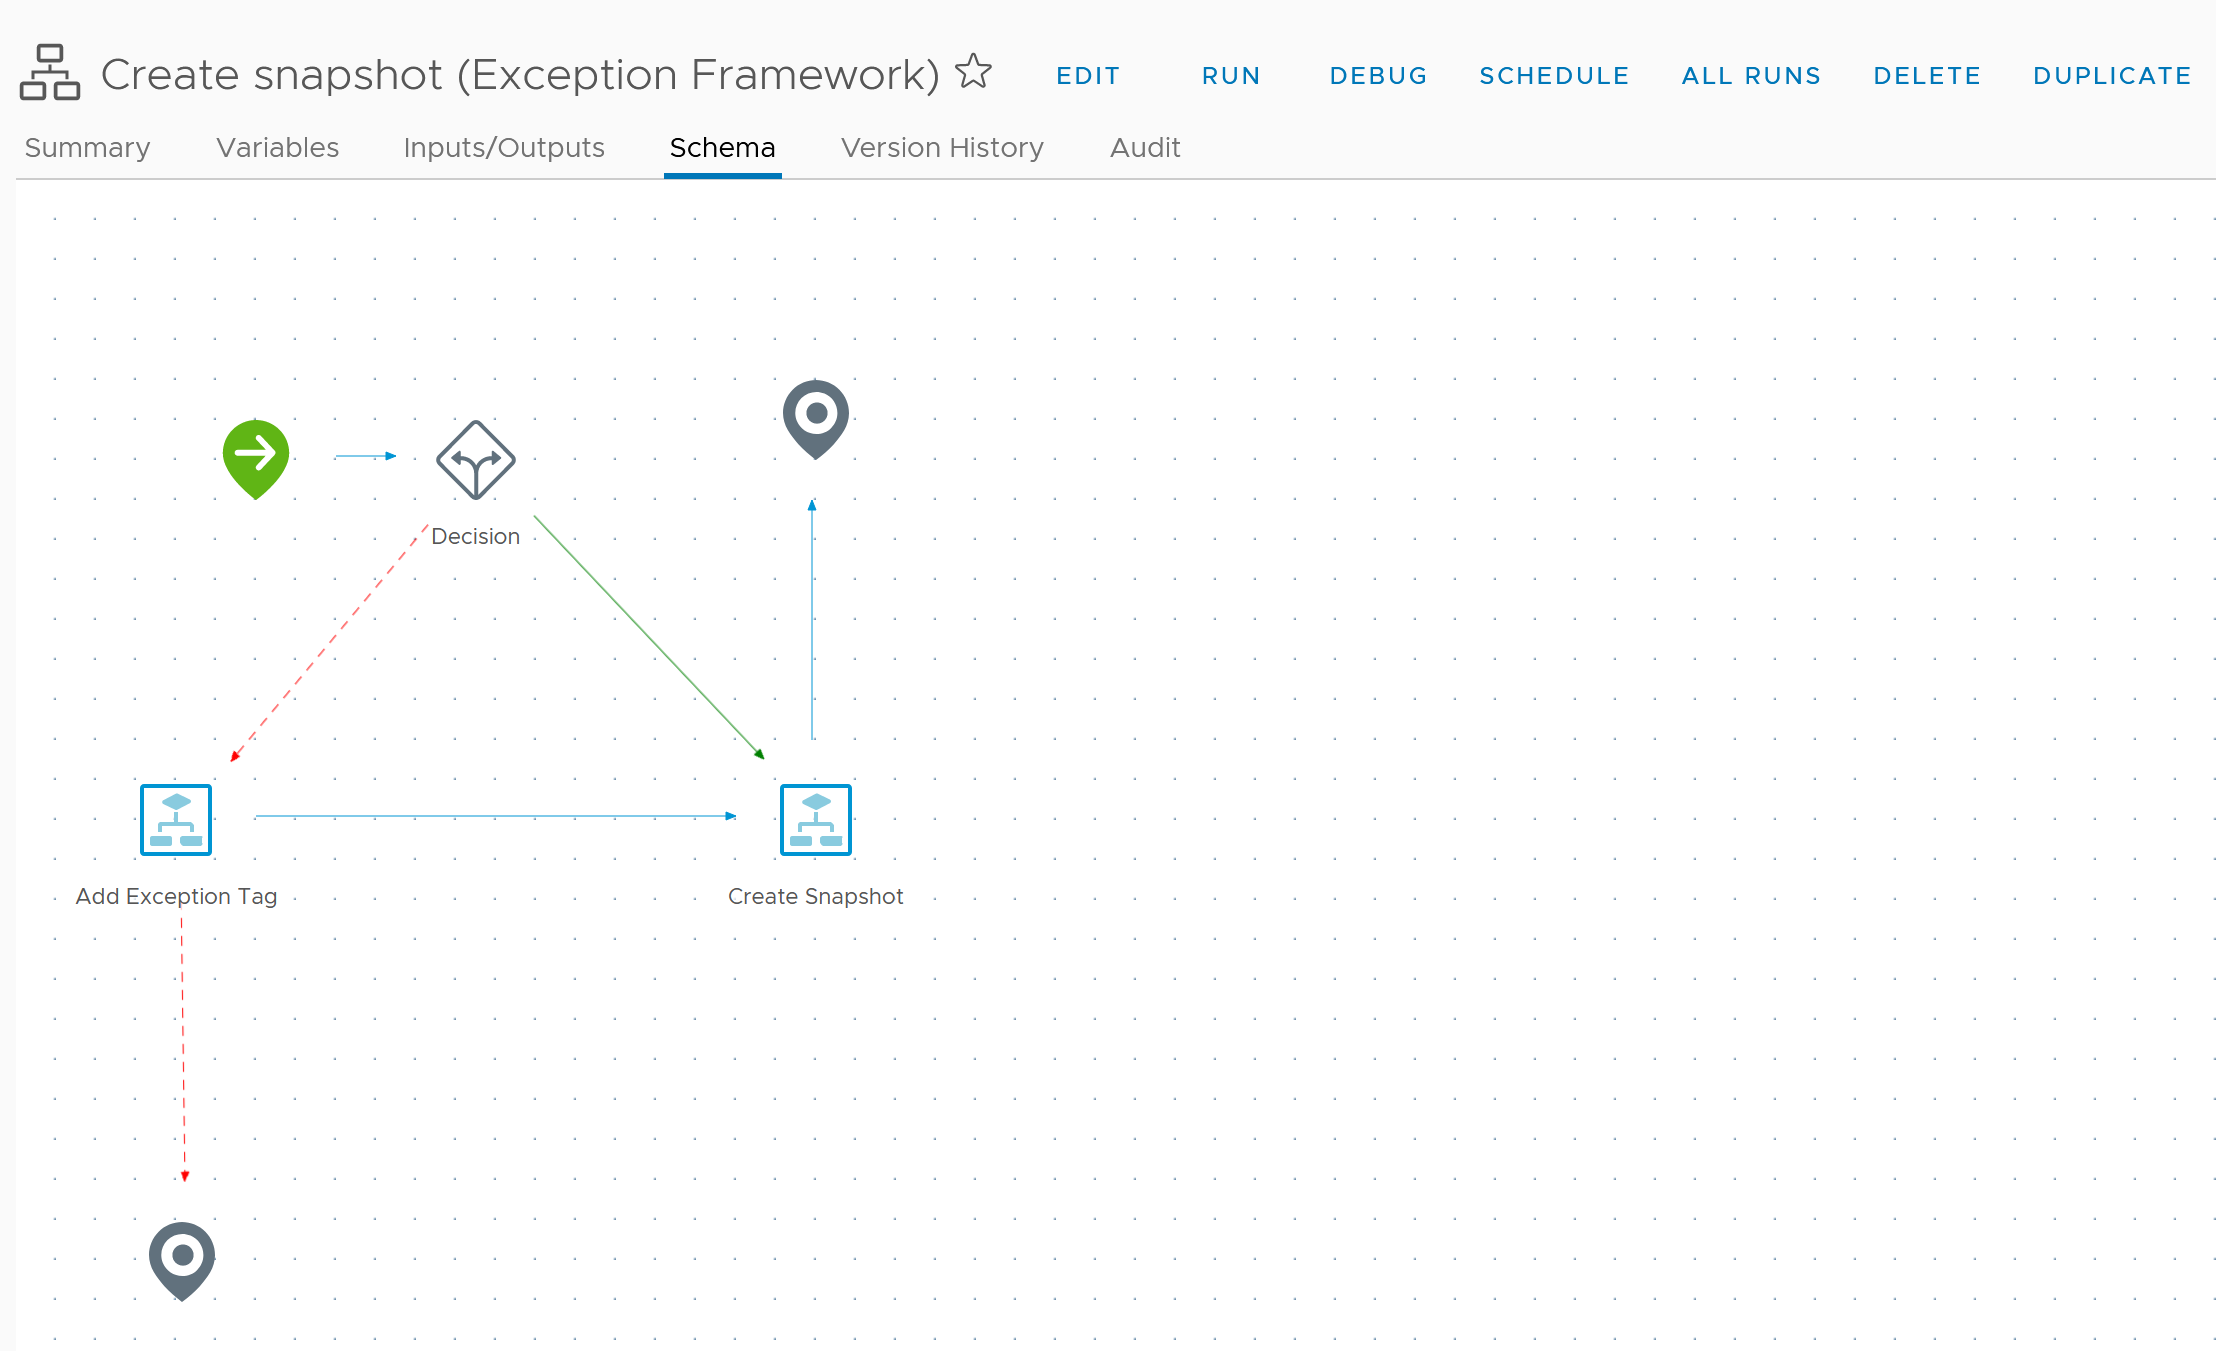
The inputs and outputs of the workflow are very straight forward:
- inputs
- vm: This is the VC:VirtualMachine object you want the snapshot to be created on. It is selected by the vRO presentation layer, or as we will discuss in a future part in this series, a vRA "XaaS" catalog item.
- snapShotException: This is a boolean object that indicates to the workflow if we should add the lifetime exception tag to the VM, which signifies to vROPS to delete the snapshot after 7 days instead of 3. Again, this is from vRO presentation layer, or a vRA form.
- snapShotName: A string field that is used to name the snapshot.
- outputs
- snapShotOutput: An object that contains the VC:VirtualMachineSnapshot object of the created snapshot.
The main entry point to the workflow is a Decision that uses the exception input. If the value of this variable is true we go down the path where we add an exception tag to the VM. If it is false we simply execute the Create a snapshot workflow from the built-in library.
Execution Walk through
Execute the workflow by selecting it and choosing Run. Fill in the fields presented by the form: snapshotException, vm, and snapShotDescription and click Run.
When the workflow kicks off, you can watch for the snapshot task to execute and vCenter and verify that the tagging works as expected.
Closing
Today we covered the vRO components that perform the heavy lifting in this process. This is a powerful automation flow, but requires very little coding. It's a great example of how you can stich together community sourced workflows and/or the built-in workflows to create a workflow capable of solving interesting problems.
I need to ensure that I give credit to Oliver Leach for their vRO vSphere tagging workflows. I leveraged them with zero to minimal changes in this example. They were a great helping in speeding my development of this process.
Thanks for reading today. Next time we will cover the vROPS policies and actions that trigger these workflows.